So now I have one of these toys too. After I was made an irresistible offer, I simply couldn’t resist. Now I fly my drone in Thailand.
The photos and videos on the internet are usually spectacular. The unusual perspective alone, which is difficult for people to achieve, makes the shots extraordinary. The fact that Thailand offers more than enough motifs also makes it very tempting.
I considered registering the drone right from the start to avoid any difficulties. However, my Thai environment also surprised me with admonitions to obtain an official permit for a drone in Thailand.
You can apply for the permits yourself with my step-by-step guide
OR
you can save time and nerves.
One stop registration service
Contrary to what some people claim, it is actually necessary to register even a small drone. Only if it weighs less than 2 kg and does NOT have a camera is it not required to be registered with the CAAT. Even then, a permit must be obtained from the NBTC. Maybe you think you can get away without it, maybe you won’t get caught. I wouldn’t want to take that risk.
There is also a clear warning from the Federal Foreign Office about drones in Thailand:
Importing drones for private use into Thailand is generally allowed. However, for operation in Thailand, it is mandatory to register drones with either the National Broadcasting and Telecommunications Commission (NBTC) or the Civil Aviation Authority of Thailand (CAAT).
Failure to comply with the drone registration requirement may result in imprisonment for up to five years or a fine of up to 100,000 THB (Baht).
Travel and safety advice https://www.auswaertiges-amt.de/de/ReiseUndSicherheit/thailandsicherheit/201558
Basically, there are 2 agencies or offices to which the unmanned aircraft must be registered. The National Broadcasting and Telecommunications Commission (NBTC) for radio control and the Civil Aviation Authority of Thailand (CAAT) for the use of airspace.
IMPORTANT: Contrary to older articles on various websites, both permits can be applied for online. The entire process is therefore possible from your desk. However, you should go outside to fly.
TIP: For translations from English to German, I use DeepL. This free program is even better than Google Translator.
TIP: I use Adobe Acrobat Reader DC to fill out forms on my computer and the Adobe Fill&Sign app on my smartphone. You can also fill in the forms by hand and take a photo.
Register a drone in Thailand – 3 steps
You can obtain approval for radio control from the NBTC. This can now also be done online. This step can also be done last. Obtain permission to fly in Thailand, i.e. to use the airspace, from the CAAT. You will need drone insurance for this. Confirmation of the insurance must therefore be submitted to the CAAT before you apply.
UPDATE May 2024 – NBTC
Since the system update last weekend, there have been changes.
The good news: Unfortunately, the good news is only for Thais and not for foreigners. For you, the NBTC certificate is only valid for as long as you are allowed to stay in Thailand (see your passport).
From now on, the new NBTC approvals are valid for a lifetime!!! This means that as long as the drone is flown by the registered user.
The bad news: If you enter the country without a visa, you cannot prepare the registration of the drone in advance. You have to wait until you have entered the country. Time lost on vacation. It was nicer to upload all documents at home except for the entry stamp and then only submit the stamp later.
The NBTC has always been relatively quick so far. At most, around holidays (vacation time for Thais), the approval took more than a few working days. I’m curious to see if that remains the case.
You don’t want to deal with it? Neither before nor during your well-deserved vacation? Then let us take care of registering your drone.
Click here for the REGISTRATION SERVICE
Drone Insurance Thailand
To register with the CAAT, a drone in Thailand or its pilot needs insurance. I obtained various quotes for this.
I found the Thai insurances from AA Insure and FEIC. But there are also cheaper ones. I currently have one with Thai Pattana. However, this was via LINE, so it’s not an option for many vacationers (unless you use our drone registration service ).
The price comparison portal Masii also offers drone insurance, but not all models are available in the selection list.
You have to spend between 599 and 1599 THB per year, depending on the size, for one year’s insurance without damage to the drone. So a pure liability with a cover of 1 million baht. Only valid in Thailand.
ATTENTION Foreign liability insurance policies that include drones are only accepted in Thailand if you can present an explicit drone insurance policy with an English-language confirmation with the amounts required by the CAAT.
The following has been requested for the offer:
- Name of the insured person
- Address of the insured person
- Date of commencement of insurance/insurance period (insurance cover begins and ends at 16:30. Annual insurance only. No refund of the premium in the event of early termination).
- Details of the drone: make and model + year of manufacture + serial number
- Names of operators/pilots
- Copy of the policyholder’s passport
- Drone photos (all sides and photo with serial number)
- Weight of the drone
If you want to transfer money from abroad to Thailand, I recommend Wise (formerly Transferwise). The transfer is then transparent, cheap and fast. Check it out here.
CAAT
You must first register as a user at www.caat.or.th/uav before you can register your drone. The permit is free of charge.
To register, click on “drone register“.
On the next page, click on the “accept” checkbox at the bottom of all three tabs. Read through these rules. Some of them are important so that you know where and how you are allowed to use your drone.
The Self Declaration is a form in which you declare that you are suitable to fly an unmanned flying object in Thailand and that you will comply with the applicable rules. If you have never been convicted in Thailand, you can safely check both boxes.
After the registration has been confirmed, you can log in to the site.
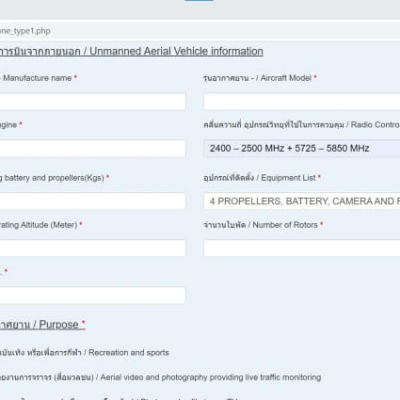
You will now be asked to enter your details. You will notice that the same information is required again and again. I have entered 90 meters as the maximum height. Drones are not allowed to fly higher than this in Thailand.
“Purpose”, in other words the application purpose, is „Recreation and Sport“ and „Photography …“.
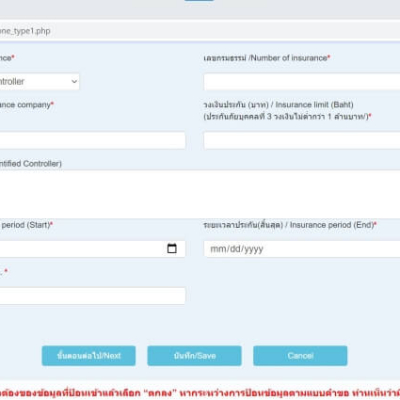
„Type of Insurance“ is „identified controller“, for certain pilots who also appear in the list of pilots.
Click on the pictures to enlarge
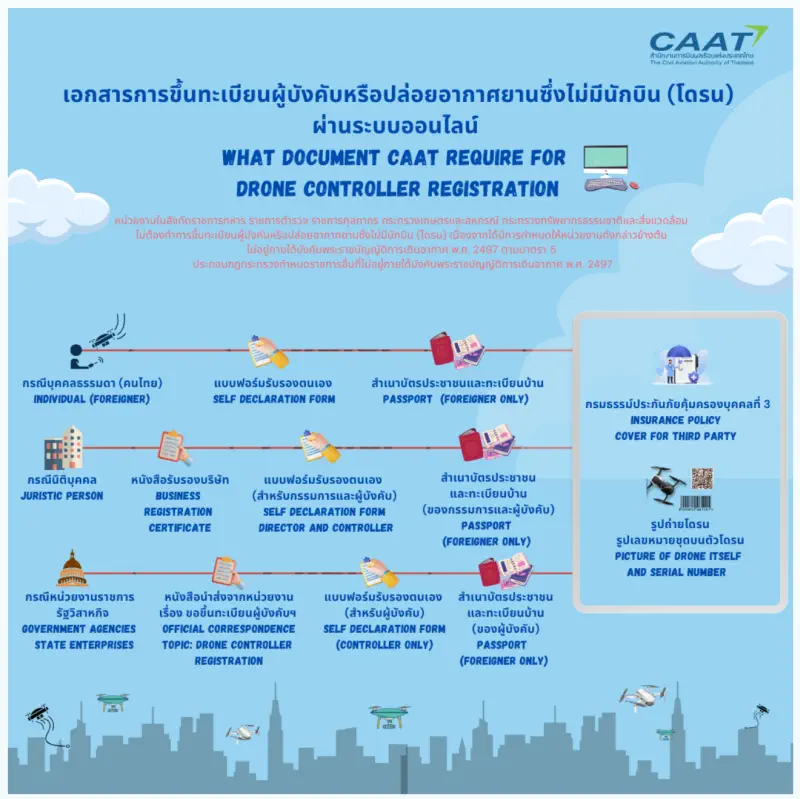
CAAT requires the following in a document as an attachment:
- Self declaration
- Picture of the passport
- Insurance policy
- Picture of the drone (to be seen in full)
- Picture of the serial number of the drone)
CAUTION: Everything is required in a PDF file. There is a CAAT template that shows this. Test documents submitted as jpg files were not accepted. The file must not be larger than 30 MB.
I put all the required documents – some of them as screenshots – into a Word file and saved it as a PDF. I subsequently added the insurance policy, which was already available as a PDF, using the merge PDF tool.
Status Check
After submitting the form, you have to wait. First “requested” is indicated, then later “waiting for approval”. On the registration homepage, it says nicely “The result will be announced within 15 working days if all documents are available.”
CAUTION: No mail will be sent. So you have to keep checking it yourself. You can do this at the top left of the menu (with the 3 dashes) under “History”.
After registering for the first time, I finally had the status “requested approval” exactly 4 weeks after registration after checking the CAAT portal from time to time. The PDF document is easy to download and print.
The CAAT approval is valid for 2 years. The insurance, however, is only valid for one.
NOTE CAAT provides the telephone number 06 32 05 88 16 for inquiries. The staff there are very helpful and speak English.
NBTC
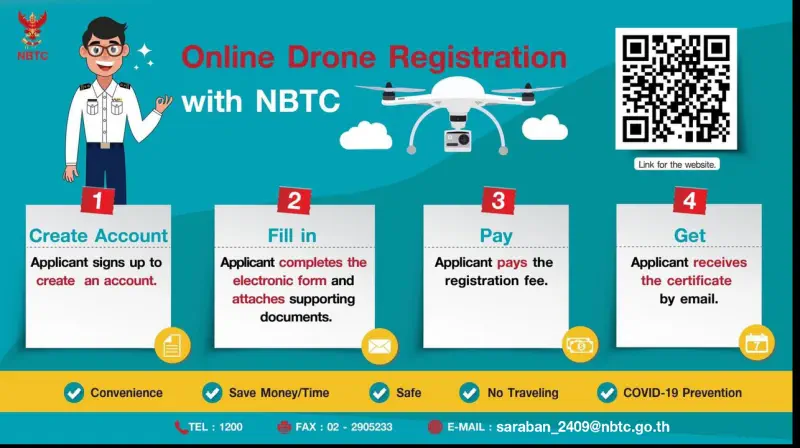
The NBTC (National Broadcasting and Telecommunications Commission) requires a few documents and a photo of the stamp you receive upon entry at immigration. A fee of 214 Baht can be paid online or at a Kasikorn Bank.
IMPORTANT: If you are entering the country with a visa, you can prepare this at home. If you do not have a visa, you must do this after entering the country.
For each province, there is an NBTC office responsible. When registering the drone, I had outdated information that this had to be done at an NBTC office. So, I went to the provincial administration in Chiang Rai (commonly referred to as Sala Glang). There, in Room 3.5 (3rd floor right, easily recognizable by the logo with the red Garuda), I found extremely helpful staff in a much too small office. In fact, I was asked to sit at one of the computers and complete the registration myself under guidance.
You can also do this on the website: https://anyregis.nbtc.go.th
First register on the site by clicking “sign in” at the top right. You will be sent a one-time password (OTP) to the e-mail address provided.
CAUTION: This password is only valid for 10 minutes.
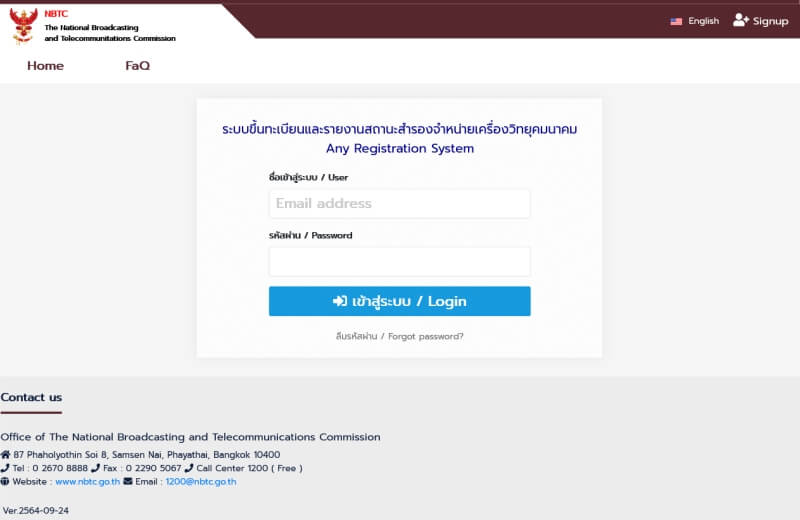
You can then log in with the new user. You must enter your passport number and assign a password.
First you have to enter your data with “edit user”. Among other things, you will be asked for your address in Thailand. You can simply enter your (first) hotel address.
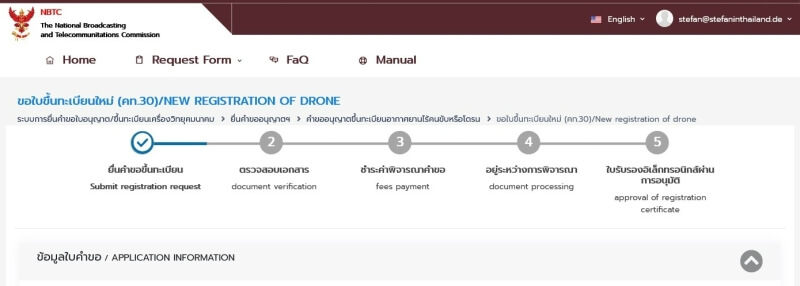
From the menu, click on “Request Form – UAV’s Radio Equipment Registration – new registration of drone”
This page asks you for a number of details. For the registration you need:
- Serial number + make and model
- Photo of passport
- Photo of visa or entry stamp
- Address in Thailand (possibly first hotel)
- Owner Declaration of Conformity (ODoC)
- Photo of the drone (some NBTC offices want photos from all sides)
- Photo of the serial number of the drone with QR
- Photo of the serial number of the controller with QR
- Invoice incl. tax (only if the drone was purchased in Thailand)
NOTE: If you did not buy the drone in Thailand and only want to fly it on vacation, you can click on “Temporarily imported into the country”.
For VISA or NO VISA, you indicate whether you are entering with or without a visa. If you enter with a visa, you can specify a future appointment, but without one, the options are limited.
NOTE: If you receive an error message when entering the serial number, you can ignore it and enter the data manually instead: Drone brand, model, controller brand, controller serial number (under the QR code on DJI controllers).
NOTE: Use a QR code app to display the correct serial number.
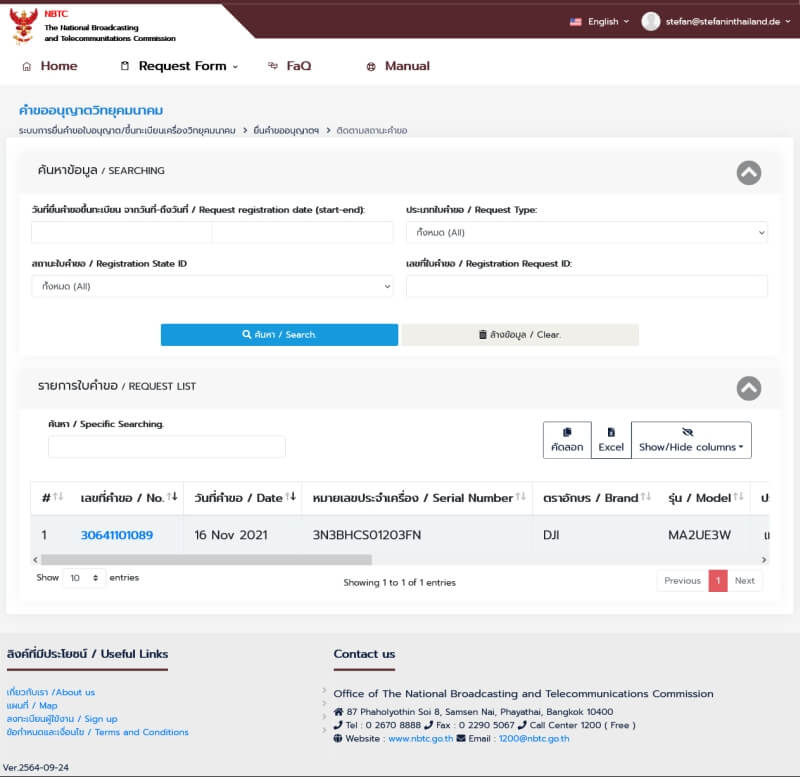
Check Status
After entering and clicking on “Apply“, you can check your status in the menu under “Request Form – Track Request Status”
Payment
You will be asked to pay the invoice of 214 THB by e-mail. This can be done either at a Kasikorn bank, in cash at the office or via online banking. Ideal for travelers: Simply go to the nearest Kasikorn bank and pay at the counter. You should have the printout of the payment request with you.
NOTE: You can easily find the nearest Kasikorn Bank using Google Maps.
CAUTION: The amount must be paid immediately.
Success notification
The success message arrived by e-mail within a few days:
„Your UAV’S RADIO EQUIPMENT REGISTRATION request has passed. Approval has been approved.
You can check or download a document of a radiocommunication certificate for non-pilot aircraft. For general use (Certificate of Registration for Radio Communication in Unmanned Aerial Vehicles (UAV)) from this link …”
Since May 2024, the NBTC permit has been valid for as long as the owner flies the drone. (Previously, the validity was dependent on the residence permit).
Success + Request
I now always have the two permits with me as PDF documents on my cell phone and also have them printed out in my drone bag. Although it was important for me to register my drone in Thailand, I hope that I will never be in a situation where an official asks to see these documents.
Let me know if this guide was helpful for you, or if you have had any other experiences. Just write a comment below.
If you would like to support my blog or thank me for the information, you can invite me to dinner. Payment can be made with a credit card or PayPal.
Thank you very much!
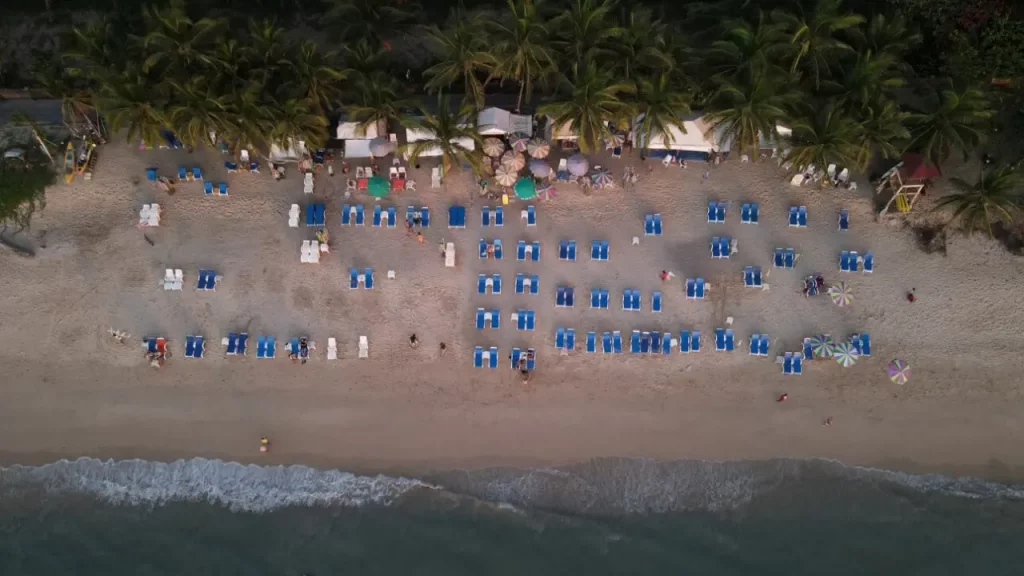
Please respect the Thai rules AND fly respectfully. Flying just over people’s heads can not only be annoying for them, but also frightening. Even and perhaps especially on the beach.
Registration service – We take care of it for you
- Do you want to save time and nerves and not have to deal with the Thai authorities?
- Do you find registering your drone in Thailand annoying, but don’t want to take the risk?
- You don’t know much about computers and don’t know how to put the documents into a PDF?
- You have better things to do than waste your time on the first days of your vacation for the NBTC registration?
If you were able to say YES at least once, you should consider our drone registration service.
We take care of the bureaucratic formalities with the Thai authorities and provide you with the required drone insurance. You don’t have to deal with any frustrating issues
Rules and safety when flying a drone in Thailand
The so-called “No Fly Zones” (document with all prohibited zones) are areas used by the military or the navy, for example, in which no drones may be launched. These also include Koh Kud and Sattahip.
Before you fly
- check that the unmanned aircraft and its remotely piloted aircraft system are in airworthy condition;
- obtain permission from the owner of the land to be flown;
- check the surroundings and airspace of the airfield
- have an emergency plan that includes a plan for accidents, medical care and a plan for problem solving if the aircraft becomes uncontrollable.
- carry out maintenance of the unmanned aircraft in accordance with the manufacturer’s manual;
- have knowledge and skills to control the unmanned aircraft and its system
- has knowledge and understanding of the rules of the air;
- carries the certificate of registration or a copy thereof throughout the flight;
- carry a serviceable fire extinguisher throughout the flight; and
- have an insurance policy covering damage to life, limb and property of third parties with a minimum sum insured of not less than one million baht;
While you fly
- Shall not fly in a manner that may endanger the life, property and peace of others;
- shall not fly into restricted areas, limited areas and dangerous areas announced in the Aeronautical Information Publication – Thailand or AIP-Thailand, government buildings and hospitals unless authorized;
- the take-off and landing area must not be obstructed by anything;
- must keep the unmanned aircraft in sight at all times and must not rely on the monitor or other devices;
- may only fly between sunrise and sunset when the unmanned aircraft is clearly visible;
- must not fly in or near clouds;
- may not fly within 9 km (5 nautical miles) of airports or temporary airfields unless he has permission from the airport or airfield operator;
- not to fly higher than 90 meters above the ground
- it must not fly over towns, villages, communities or areas where people are present
- must not fly in the vicinity of other aircraft that have pilots;
- must not violate the personal rights of others;
- must not cause a nuisance to others;
- shall not deliver or transport dangerous objects or lasers on board the unmanned aircraft; and
- shall not fly horizontally closer than 50 meters (150 feet) to people, vehicles, structures or buildings
- in the event of an accident, the pilot or air traffic controller must immediately notify the person in charge (during business hours tel.: 02-5688800, ext. 1504, 1505, fax: 02-5688848, outside business hours: Tel. 081-8392068 or by e-mail: uav@caat.or.th)
Questions and answers
You might also be interested in:
MyDroneThailand – Drone registration service
5 Top Tips for SUVARNABHUMI AIRPORT Bangkok
My tips for you: trips in Chiang Rai province
Comparison of Bangkok Airport Hotels
